

5:30 PM on Friday, August 7. 2009
So you want to save money on shipping...
When I started my Etsy shop last year, I had this crazy idea that, hey, I bet I could save a TON of money on shipping supplies and be good to the environment at the same time! I spread my idea around to feel out how people would feel about it, and everyone thought I was totally crazy.
And being the adventurous kind of girl I am, I tried the idea anyway. On someone in Canada. I figured if it made it through the border, it would make it through anything.
So I bet you're wondering what my big idea was. I really like drawing things out. It gives me a bit of a thrill.
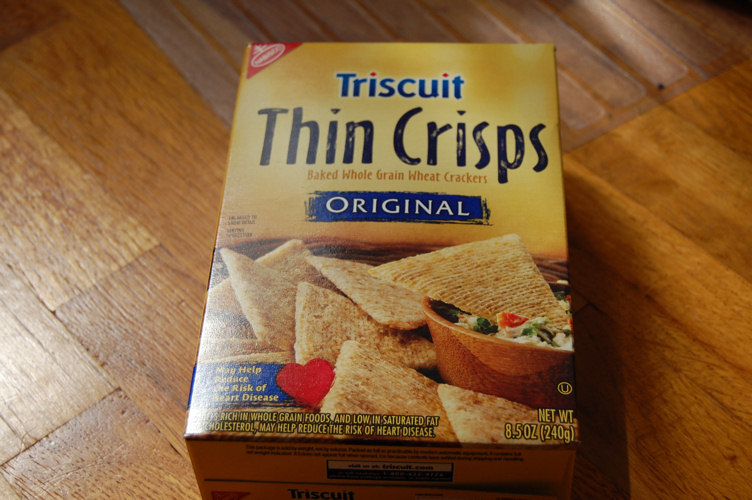
Well, you know when you finish a box of crackers, you have this box left over? Or a box of stuffing, or cereal, or just about any food stuffs these days. There's this perfect empty box just waiting for someone to do something with it, and instead of putting it to good use, most people throw it away. Not me. I'm cheap as hell and crafty to boot.
So what I did was I took the box apart. I thought, "Hey, I bet I could turn this inside out and then glue it back together, make it a generic box on the outside and kind of funky cool on the inside." Plus, it's a huge savings for me in shipping, both because I don't have to buy packaging, and because these boxes are much lighter than their cardboard brothers.
And being the generous and loving person I am, I decided to share my idea with all of you! With picture instructions, of course, because it's fun to look at pictures.
For this project, you'll need three things:
-Empty box
-Hot glue gun
-Hot glue
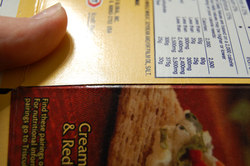
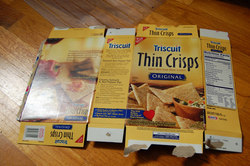
For the box, you want one the size of, say, stove top stuffing, crackers (not saltines), or those small boxes of granola. You can use something bigger like a cereal box, but they're way too big to be shipping small stuff in. Although you CAN cut these boxes down, it takes practice to get it right. I'll have to post how to do that another time.

Oh yeah, just click on these images if you want to get a better look at what I'm doing. I thought it would be kind of mean to have all these pictures in their original sizes sitting around to attack your internet speed.
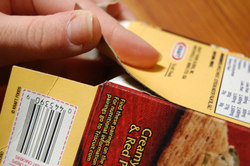
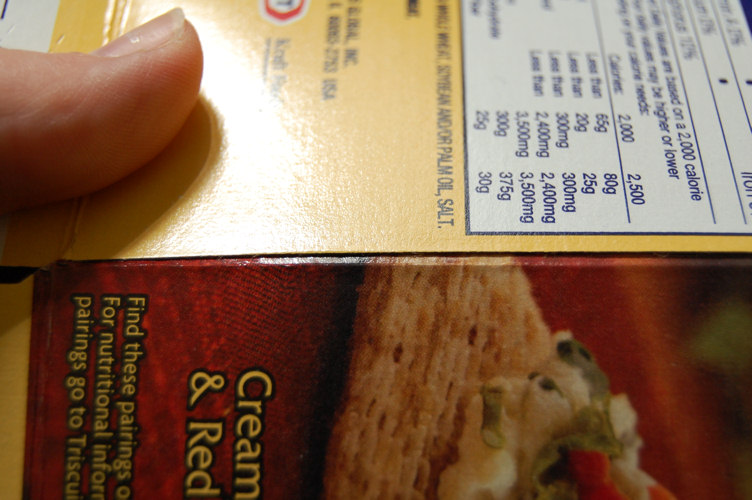
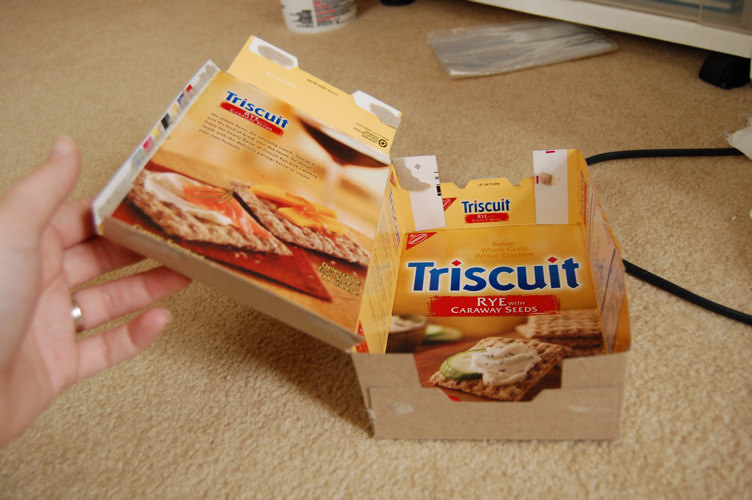
After you get your box, it's time to dismantle it. The first thing you want to take apart are the bottom flaps. Those are pretty easy to unstick.
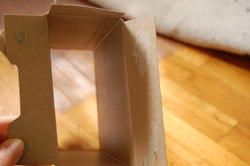
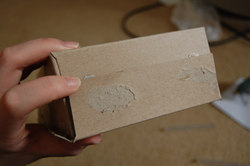
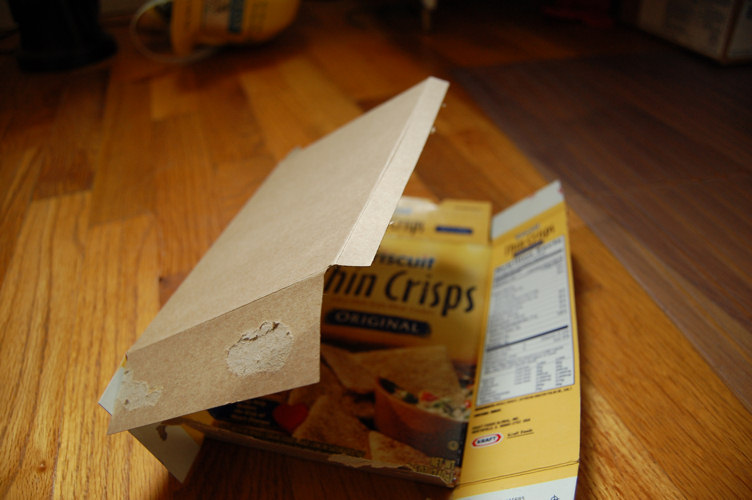
Once that's done, the next step is to look along the side of the box for the magical seam that gives it its boxy shape. It's usually a little hard to find at first, but keep looking. This seam is a little harder to take apart, so you might try putting an envelope opener in it, or maybe a sharp knife. But DON'T CUT THE BOX! You just want to unglue it, not cut any part of it off.
When you're done, you should have something that looks like this!
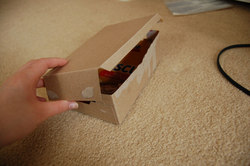
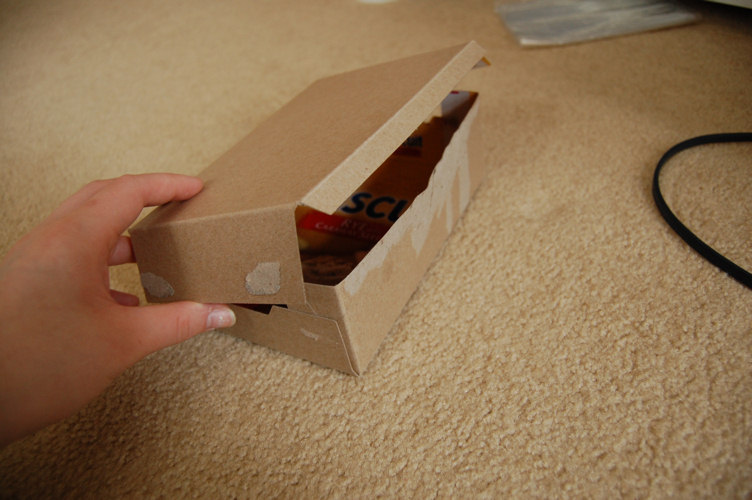
That wasn't too hard, right? Ok, we're about half way through already. The next step is just folding all the folds in the opposite direction, essentially turning the box inside out.

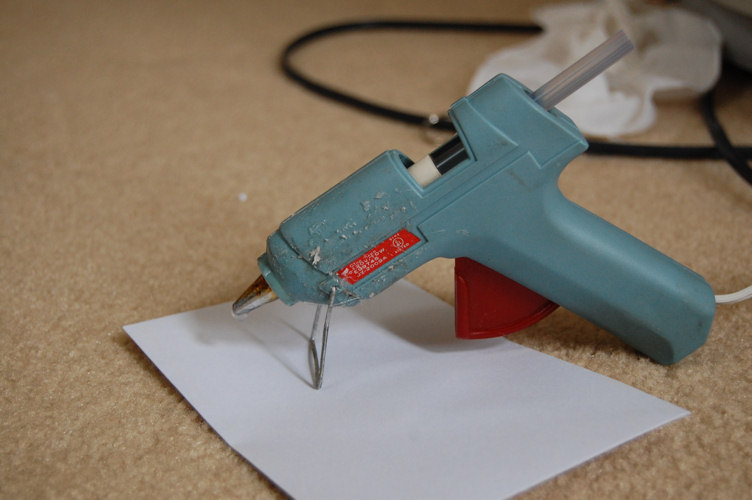
Next, get out your handy dandy glue gun. I use an ancient high temp gun I've had since I was about 12 (13 years!). You can count its age by the depth of the glue stuck on the outside of the gun.

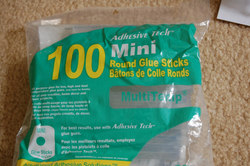
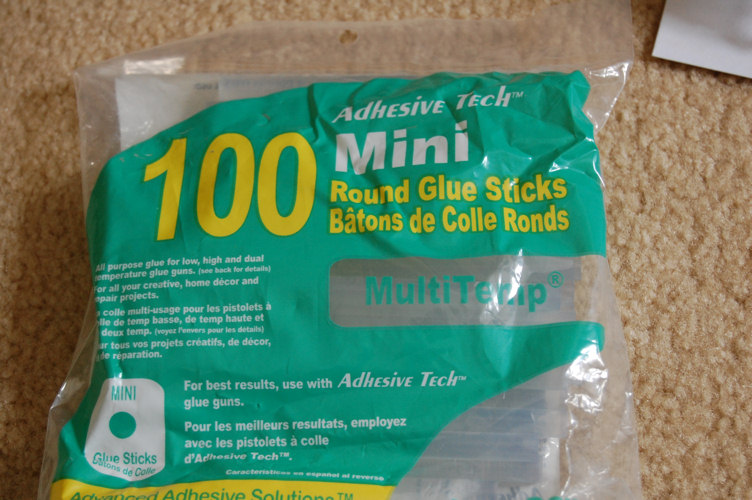
Of course, you'll need glue sticks. This isn't so bad, though. You can get 100 glue sticks for something like $1 at Walmart, and since each box takes about half a stick, that means you only pay roughly half a penny per box. Not a bad price for packaging.
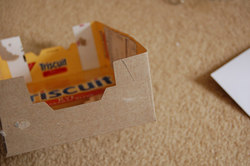
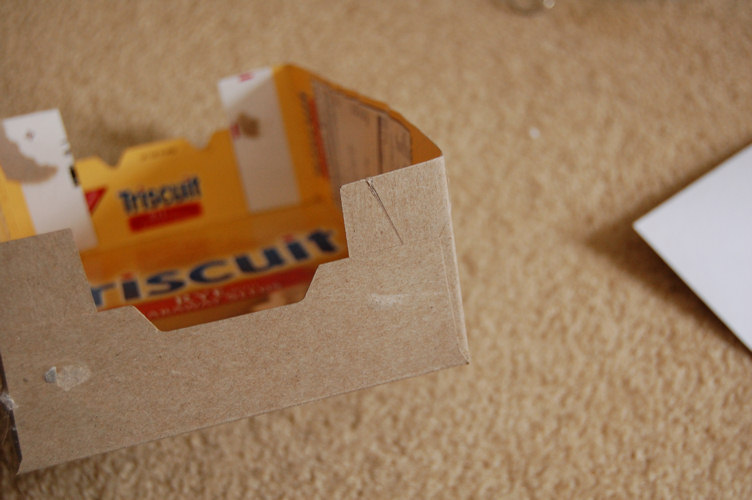
Now, when you start gluing, you do NOT want your box to end up looking like this:
Yeah. I totally wasn't paying attention because I was thinking in my head about what I would say in this post, and glued down all the flaps. Which is ok, except then you can't get anything into the box, and I really doubt your patrons want to get an empty box in the mail.
Instead, what you want to do is glue only the bottom three flaps of your box, so that it comes out looking like this:
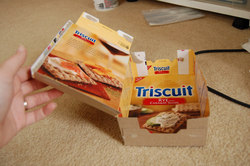
The reason for gluing it like this is so that you have a top flap that you can fold down. And see, it has a little bit that overlaps, so it secures better when tape it.
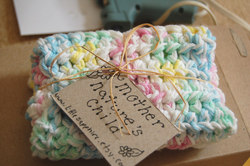
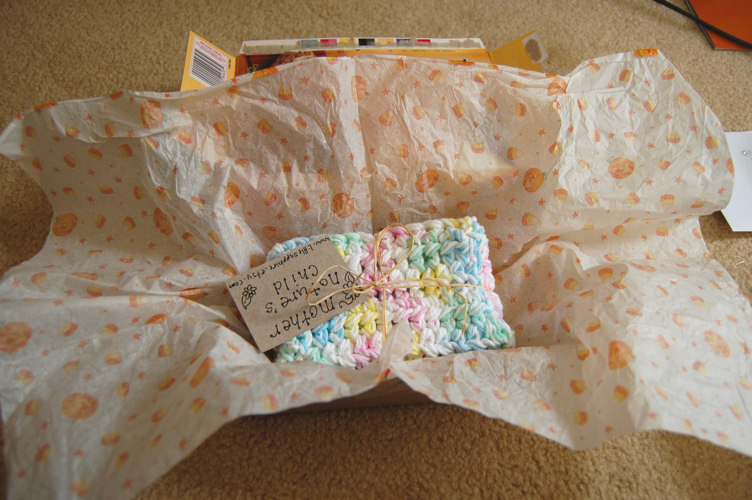
Of course, next you want to package up your item and put it in the box! I always tie a little raffia around what I made and add a cute little handmade tag (also made out of old boxes!). Once that's done, I wrap it in tissue paper and bundle it all together.

And that's about it! The boxes are just the right size so you can simply wrap clear packing tape all around the narrow side panels to secure it. I generally add a little extra to the top and fold it down over the overlapping flap. Just in case.
You probably wouldn't want to do this for packaging if you were shipping, say, five things a day. You'd run out of boxes pretty quick. But two or three a week wouldn't be a stretch. I've often thought about using really little boxes, like soap boxes and butter boxes, but I have no idea how small a box the PO will send. But seeing as they'll send things like bananas and shoes, I can't see why they wouldn't send a little box.
Also, if you're paranoid (like I was when I first started making these), you can reinforce the corners with pieces of cardboard. Just cut the cardboard to the height of the box, and maybe two inches wide. Then fold the cardboard in half, so that it fits snugly into the corner of your box, and simply glue it down. I also would glue the box shut once I got the items in it, but I decided that was probably a bad thing. I hate having to tear a box to shreds to get into it, and I'm sure everyone else does!
Ok, so BIG WARNING!! Do not ship anything fragile in these boxes. There is a chance for them to get crushed, and so fragile or heavy items should be shipped in a larger, sturdier cardboard box! They work perfectly for me because my items are soft and squishy, and because they fit snugly into the boxes and leave no room for the box to get crushed. Just a warning so that if you complain, I can tell you that I told you so
So off you go to save the world from clutter, one box at a time!
And being the adventurous kind of girl I am, I tried the idea anyway. On someone in Canada. I figured if it made it through the border, it would make it through anything.
So I bet you're wondering what my big idea was. I really like drawing things out. It gives me a bit of a thrill.
Well, you know when you finish a box of crackers, you have this box left over? Or a box of stuffing, or cereal, or just about any food stuffs these days. There's this perfect empty box just waiting for someone to do something with it, and instead of putting it to good use, most people throw it away. Not me. I'm cheap as hell and crafty to boot.
So what I did was I took the box apart. I thought, "Hey, I bet I could turn this inside out and then glue it back together, make it a generic box on the outside and kind of funky cool on the inside." Plus, it's a huge savings for me in shipping, both because I don't have to buy packaging, and because these boxes are much lighter than their cardboard brothers.
And being the generous and loving person I am, I decided to share my idea with all of you! With picture instructions, of course, because it's fun to look at pictures.
For this project, you'll need three things:
-Empty box
-Hot glue gun
-Hot glue
For the box, you want one the size of, say, stove top stuffing, crackers (not saltines), or those small boxes of granola. You can use something bigger like a cereal box, but they're way too big to be shipping small stuff in. Although you CAN cut these boxes down, it takes practice to get it right. I'll have to post how to do that another time.
Oh yeah, just click on these images if you want to get a better look at what I'm doing. I thought it would be kind of mean to have all these pictures in their original sizes sitting around to attack your internet speed.
After you get your box, it's time to dismantle it. The first thing you want to take apart are the bottom flaps. Those are pretty easy to unstick.

Once that's done, the next step is to look along the side of the box for the magical seam that gives it its boxy shape. It's usually a little hard to find at first, but keep looking. This seam is a little harder to take apart, so you might try putting an envelope opener in it, or maybe a sharp knife. But DON'T CUT THE BOX! You just want to unglue it, not cut any part of it off.

When you're done, you should have something that looks like this!

That wasn't too hard, right? Ok, we're about half way through already. The next step is just folding all the folds in the opposite direction, essentially turning the box inside out.
Next, get out your handy dandy glue gun. I use an ancient high temp gun I've had since I was about 12 (13 years!). You can count its age by the depth of the glue stuck on the outside of the gun.
Of course, you'll need glue sticks. This isn't so bad, though. You can get 100 glue sticks for something like $1 at Walmart, and since each box takes about half a stick, that means you only pay roughly half a penny per box. Not a bad price for packaging.
Now, when you start gluing, you do NOT want your box to end up looking like this:

Yeah. I totally wasn't paying attention because I was thinking in my head about what I would say in this post, and glued down all the flaps. Which is ok, except then you can't get anything into the box, and I really doubt your patrons want to get an empty box in the mail.
Instead, what you want to do is glue only the bottom three flaps of your box, so that it comes out looking like this:
The reason for gluing it like this is so that you have a top flap that you can fold down. And see, it has a little bit that overlaps, so it secures better when tape it.
Of course, next you want to package up your item and put it in the box! I always tie a little raffia around what I made and add a cute little handmade tag (also made out of old boxes!). Once that's done, I wrap it in tissue paper and bundle it all together.

And that's about it! The boxes are just the right size so you can simply wrap clear packing tape all around the narrow side panels to secure it. I generally add a little extra to the top and fold it down over the overlapping flap. Just in case.
You probably wouldn't want to do this for packaging if you were shipping, say, five things a day. You'd run out of boxes pretty quick. But two or three a week wouldn't be a stretch. I've often thought about using really little boxes, like soap boxes and butter boxes, but I have no idea how small a box the PO will send. But seeing as they'll send things like bananas and shoes, I can't see why they wouldn't send a little box.
Also, if you're paranoid (like I was when I first started making these), you can reinforce the corners with pieces of cardboard. Just cut the cardboard to the height of the box, and maybe two inches wide. Then fold the cardboard in half, so that it fits snugly into the corner of your box, and simply glue it down. I also would glue the box shut once I got the items in it, but I decided that was probably a bad thing. I hate having to tear a box to shreds to get into it, and I'm sure everyone else does!
Ok, so BIG WARNING!! Do not ship anything fragile in these boxes. There is a chance for them to get crushed, and so fragile or heavy items should be shipped in a larger, sturdier cardboard box! They work perfectly for me because my items are soft and squishy, and because they fit snugly into the boxes and leave no room for the box to get crushed. Just a warning so that if you complain, I can tell you that I told you so
So off you go to save the world from clutter, one box at a time!


Comments
What a lovely idea. Thanks for sharing!
I saw your thread on the etsy forums. I love this idea! It reminds me of a little cigar box or something when you open it up. Super clever!
www.thimblekissblog.blogspot.com
Great idea - thank you for this useful tutorial. I use big pieces of corrugated cardboard boxes cut to fit my flag wall hangings like a book cover, then wrapped in brown paper. They have been sent abroad successfully, and as you say, much cheaper than new, and better for the environment.